2022 年 6 月更新
不再推荐 Pulsed Media 这一家 Seedbox 服务提供商。服务提供商傲慢的态度,以及随意关停账号的行为,Pulsed Media 已经被 Reddit 禁言,在 LowEndBox 中也有非常多的关于不推荐 Pulsed Media 的帖子。
Pulsed Media 是一家 [[Seedbox]] 服务提供商,Seedbox 通常指的是专门为 Seeding(做种)而设计的下载上传服务器,通常有比较大的硬盘,带宽。Seedbox 通常有被称为「盒子」。
Pulsed Media 是一家共享盒子,也就是意味着多人共享一台独立主机,多人可能共享同一个 IP 地址。Pulsed Media 成立于 2009 年,机房在芬兰赫尔辛基。
我购买的是 12 周年促销款 V10G L,包含 8T 空间,8G RAM,10Gbps 带宽,以及 32000 GiB 的外部流量,无线的内部机房流量。价格是 11.99€ 一个月。
从官网及促销页面来看,自带支持 [[rTorrent]] 和 [[ruTorrent]],以及可以选择开启的 [[Dulege]] 和 [[qBittorrent]]。支持公开的 tracker。
自带 HTTP, HTTPS, FTP, SFTP, LFTP, SSH 访问。还允许安装使用 rclone, sonarr, pyload, resilio, syncthing, btsync (1.4 and 2.2), ffmpeg, fuse (unionfs, sshfs, s3fs etc.) 等等。
而串流支持 [[Jellyfin]] 和 [[Emby]],不支持 [[Emby]],因为创始人对于 Plex 曾经的一些行为不满。
购买及初始化使用
Pulsed Media 支持 Paypal,加密货币(BTC, LTC, XMR, ETH, DOGE 等等),购买 14 天内支持无条件退款。
在购买之后很快就会收到邮件,里面会包含后台登录地址,用户名和密码,以及登录 SSH,SFTP 等等的信息。
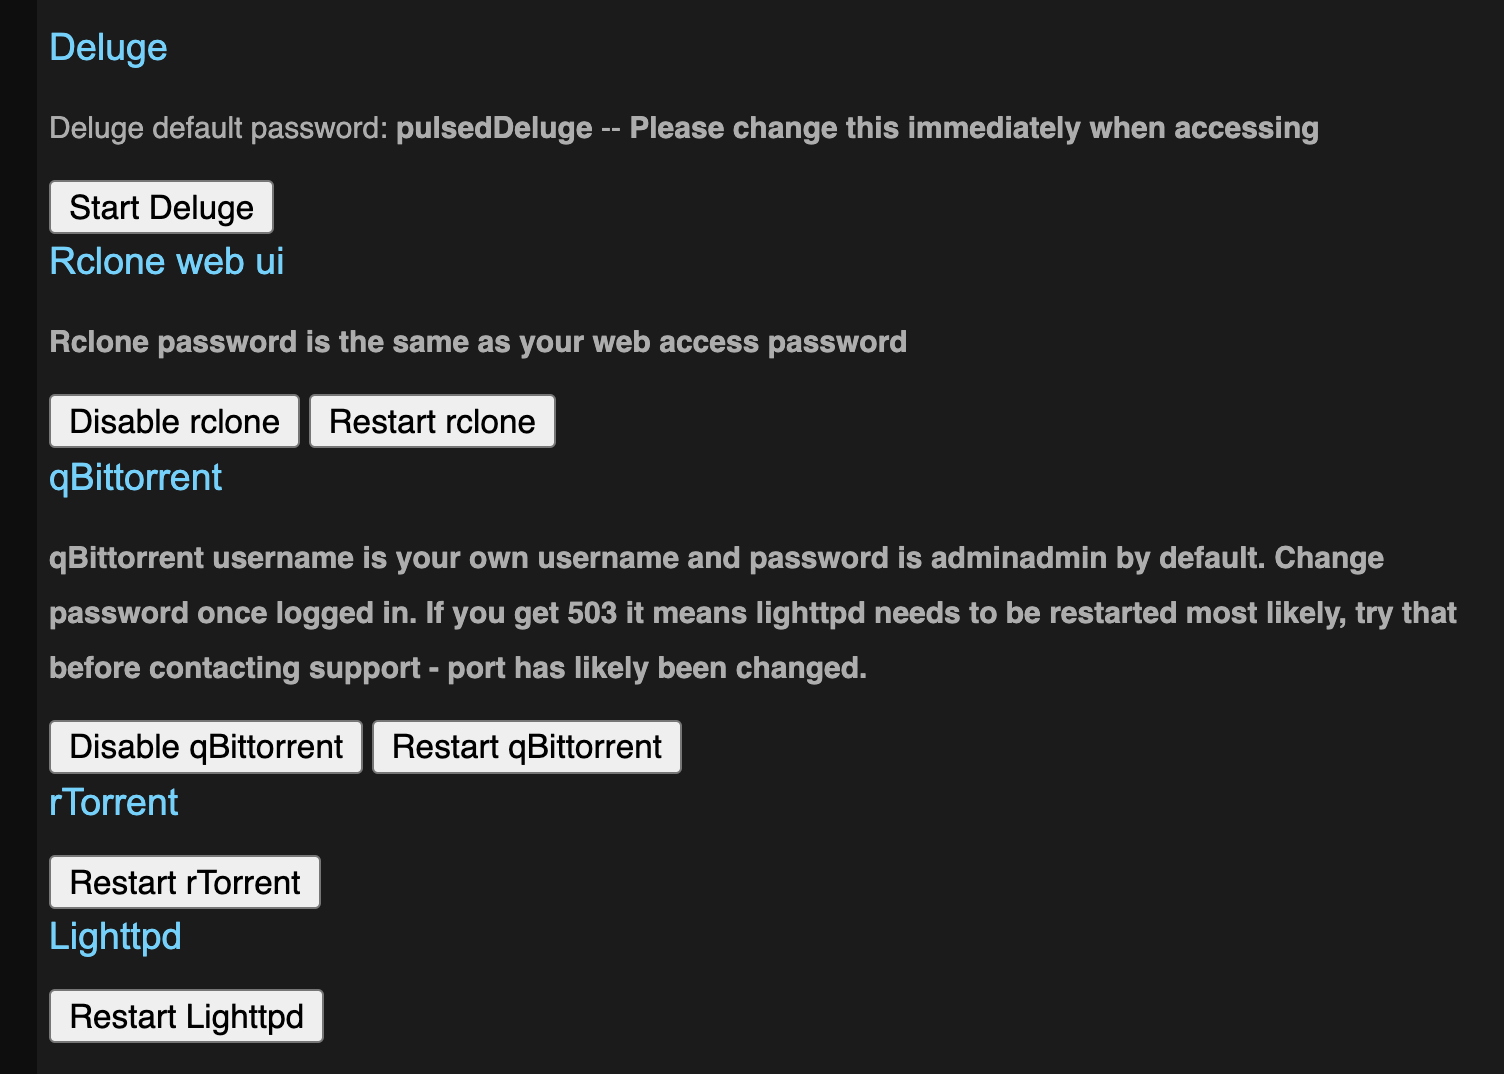
用里面的信息登录后台之后会发现 Pulsed Media 自己开发了一套 Seedbox 系统,在一台独立的主机上会开通分配多个用户。每一个用户都有一个自己独立的空间。可以通过简单的管理后台来启动一些简单的服务,比如 rTorrent, Deluge, qBittorrent 等等。

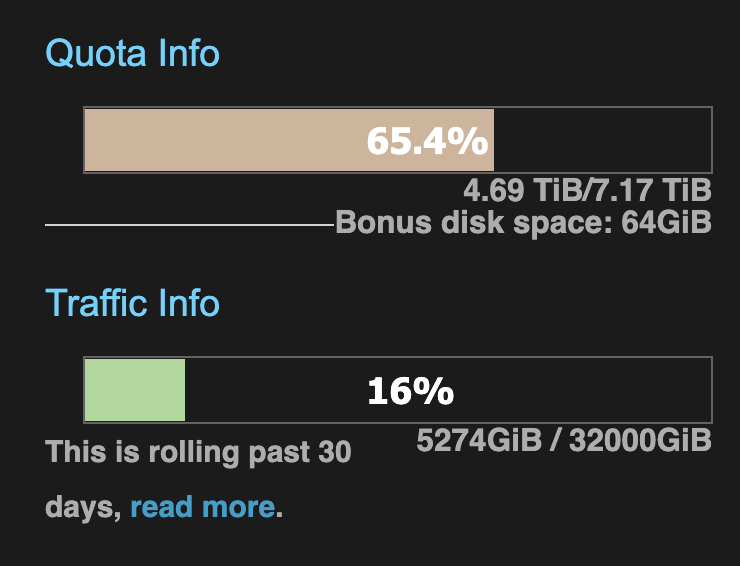
在右上角可以看到当前的空间以及流量使用情况。

Pulsed Media 有一点非常不错的是,它会奖励始终用它服务的用户,看到上面截图 Quota Info 下面的一行 Bonus disk space 就是奖励的空间。Pulsed Media 会有脚本每小时执行两次检查,每一次都随机挑选 10 位用户,如果这些用户存在剩余空间,就会给用户一些额外的硬盘奖励。具体奖励的策略可以查看其官网。
我购买 Pulsed Media 的一大理由就是其支持的服务,囊括了我曾经在博客中介绍过的非常好用的一些软件,比如自从发现了使用至今的 Syncthing,还有从 btsync 改名成 Resilio Sync 的同步工具。还有常常使用的 flexget。同时还支持很多我没有用过,但是一直想尝试一下的工具,比如 [[rclone]],[[Sonarr]], [[Radarr]] 等等。
下面就直接进入正题来记录一下我的使用过程及感受。
在 Pulsed Media 上使用 rTorrent 和 ruTorrent
Pulsed Media 最重要的就是 Seeding 了,登录后台之后能看到 Pulsed Media 默认就启用了 rTorrent 和 ruTorrent,我之前也说过,自从我在 QNAP 上发现了 rTorrent 和 ruTorrent 之后我就一直使用了这个组合。ruTorrent 的界面也非常的完善和强大,可以查看种子的 tracker 信息,制作信息,连接的 peers 信息,是我见过的显示信息最详细的一个客户端。并且 rTorrent 本身的配置就非常强大,通过简单的几行配置就可以实现按照标签自动移动完成的文件,也可以在不安装任何扩展的情况下实现 RSS 下载。总之我还有很多不懂的地方,每一次看 rTorrent 的文档总是会发现更多有趣的东西。
设定 Transdroid
[[Transdroid]] 是一款 Android 上的 rTorrent 控制端,可以对 rTorrent 等等其他客户端进行远程控制。
其中一些重要的配置如下:
Port 设置为 80
如果登录链接是: server.pulsedmedia.com/user-yourusername/
那么在高级设置中记住设置 SCGI mount point: /user-yoursername/rutorrent/plugins/httprpc/action.php
如果登录链接是: username.server.pulsedmedia.com
那么设置 SCGI mount point: /rutorrent/plugins/httprpc/action.php
详细的步骤可以参考官网
后台最重要的功能我认为就是这些了,接下来用邮件中的信息来登录 SSH 后台看看。
同理如果要在 [[PT Plugin Plus]] 中配置下载服务器,也需要使用上面的配置,需要在个人的登录链接之后加上 SCGI mount point 的路径才能连接上。
使用 SSH 登录
使用 SSH 登录后台之后可以看到用户 HOME 目录中非常干净,就这些目录。
❯ ls
data  rTorrentLog  session  watch  www
当然还有一些隐藏文件,比如 .rtorrent.rc, .rtorrent.rc.custom 等等,一眼看上去就是 rTorrent 的配置文件,其他的文件可以自行查看。上面的几个文件夹
- data 是 rTorrent 的默认下载目录
- watch 是 rTorrent 的监控目录,这个文件夹下的 torrent 文件都会被自动加载并下载,后文使用的 flexget 就可以将这个目录作为下载 torrent 的默认目录,另外也可以自行修改
.rtorrent.rc来自定义监控目录
zsh
既然我可以登录 SSH,虽然我没有 sudo 和 root 权限,但是我也可以在我自己的 HOME 目录下使用 zsh。我之前的一键初始化脚本在 Pulsed Media 上无法使用,因为用到了 chsh 命令,这个需要 sudo 权限将默认的 SHELL 更换成 zsh。不过那也没有关系。Pulsed Media 默认是安装了 zsh 的,用 which zsh 可以确认。
我只需要在 $HOME 目录下创建 .bash_profile 文件,然后填入:
export SHELL=`which zsh`
[ -z "$ZSH_VERSION" ] && exec "$SHELL" -l
然后还是使用我的脚本:
git clone https://github.com/einverne/dotfiles.git
cd dotfiles
make bootstrap
会自动初始化我的基础配置,然后退出 SSH,然后重新登录,就会启用 zsh。
在 Pulsed Media 上使用 flexget
Pulsed Media 上无法使用 Docker,所以之前文章中的安装方式就不行了,但是 Pulsed Media 上默认已经安装了 flexget 工具,直接可以运行。
flexget 默认会按照下的顺序寻找配置文件 config.yml:
- 当前目录
- virtualenv 目录
~/.flexget/~/.config/flexget
所以可以参考之前文章中的配置写法,在配置文件 .config/flexget/config.yml 中配置:
tasks:
  avistaz-free:
    rss: https://avistaz.to/rss/feed?fid=2&pid=722xxxx
    download: ~/watch
    accept_all: yes

schedules:
  - tasks: '*'
    interval:
      minutes: 30
然后 crontab -e 增加:
*/30 * * * * /usr/local/bin/flexget --cron execute
这样就会每隔 30 分钟执行一次,然后下载 torrent 到 ~/watch 目录。flexget 更多的配置详情可以参考之前的文章。
在 Pulsed Media 上安装使用 Syncthing
Syncthing 和 flexget 也类似,机器上已经安装了 Syncthing,可以直接启动,同样我也把配置放在了 .config/syncthing 目录下。
/usr/bin/syncthing --no-browser --home="/home/einverne/.config/syncthing"
Syncthing 默认的配置在: $HOME/.config/syncthing 目录下。第一次启动会自动放入默认的配置。
启动之后再根据自己的情况修改 config.xml 配置。
通常情况下可以选择一个没有被占用的端口,修改如下行:
<address>0.0.0.0:18384</address>
因为 Syncthing 需要一直在后台运行所以我启用 Tmux,然后在 Tmux 中执行上面的命令。
如果你使用我的 dotfiles,那么可以直接
tm syncthing
会自动创建一个 syncthing 名字的 Session。
如果手动创建可以使用:
tmux new -s syncthing
然后在 Tmux 中执行命令。然后用 Ctrl+B 然后按 D 来是 Tmux Syncthing 在后台执行。更多的 Tmux 的使用可以参考这篇文章。
在 Pulsed Media 上安装使用 Resilio Sync
同样 Resilio Sync 机器上也安装了,可以使用 whereis btsync 或者 whereis rslsync 来查看。
不过我嫌机器上安装的版本太老,所以自己去官网下载的一份最新的 rslsync 放到了 $HOME/einverne/bin 目录下,并且把这个 PATH 加入到了系统 PATH。
然后创建配置模板:
rslsync --dump-sample-config > .config/rslsync/rslsync.conf
然后修改模板配置,几个重要的配置:
{
   "device_name": "PM Sync Device",  // 自己设定名字
   "listening_port" : 17888, // 0 - 随机端口,或者自行配置未被占用的端口

/* storage_path dir contains auxilliary app files if no storage_path field: .sync dir created in current working directory */
 "storage_path" : "/home/einverne/rslsync",

/* set location of pid file */
 "pid_file" : "/home/einverne/var/run/resilio/resilio.pid",

/* use UPnP for port mapping */
  "use_upnp" : true,

/* limits in kB/s. 0 - no limit */
  "download_limit" : 10240,
  "upload_limit" : 10240,

/* proxy configuration */
// "proxy_type" : "socks4", // Valid types: "socks4", "socks5", "http_connect". Any other value means no proxy
// "proxy_addr" : "192.168.1.2", // IP address of proxy server.
// "proxy_port" : 1080,
// "proxy_auth" : false, // Use authentication for proxy. Note: only username/password for socks5 (RFC 1929) is supported, and it is not really secure
// "proxy_username" : "user",
// "proxy_password" : "password",

/* directory_root path defines where the WebUI Folder browser starts (linux only). Default value is / */
  "directory_root" : "/home/einverne/rslsync/MySharedFolders/",

/* directory_root_policy defines how directory_root is used (linux only).
   Valid values are:
     "all" - accepts directory_root and its subdirectories for 'getdir' and 'adddir' actions
     "belowroot" - accepts directory_root's subdirectories for 'getdir' and 'adddir' actions,
      but denies attempts to use 'adddir' to create directories directly within directory_root
   Default value is "all". */
//  "directory_root_policy" : "all",

  "webui" :
  {
    "listen" : "0.0.0.0:8888" // remove field to disable WebUI

/* preset credentials. Use password or password_hash */
  ,"login" : ""
  ,"password" : "" // (not recommended, better use 'password_hash_unified')
//  ,"password_hash" : "<crypt() 3 format password hash>" // (not recommended) Works on *nix only!
// Use either 'password_hash' or 'password_hash_unified' (recommended), but not both of them!
//  ,"password_hash_unified" : "<SHA2-256 hash in HEX format>" // Works on all platforms.
//  ,"password_hash_salt_unified" : "<any text>" // Salt for unified password's hash. Works on all platforms.
  ,"allow_empty_password" : false // Defaults to true
/* ssl configuration */
//  ,"force_https" : true // disable http
//  ,"ssl_certificate" : "/path/to/cert.pem"
//  ,"ssl_private_key" : "/path/to/private.key"

/* dir_whitelist defines which directories can be shown to user or have folders added (linux only)
   relative paths are relative to directory_root setting */
  ,"dir_whitelist" : [ "/home/einverne/rslsync/MySharedFolders/", "/home/einverne/rslsync" ]
  }

/* !!! if you set shared folders in config file WebUI will be DISABLED !!!
   shared directories specified in config file  override the folders previously added from WebUI. */
/*,
  "shared_folders" :
  [
    {
      "secret" : "MY_SECRET_1", // required field - use --generate-secret in command line to create new secret
      "dir" : "/home/user/resilio/sync_test", // * required field
      "use_relay_server" : true, //  use relay server when direct connection fails
      "use_tracker" : true,
      "search_lan" : true,
      "use_sync_trash" : true, // enable SyncArchive to store files deleted on remote devices
      "overwrite_changes" : false, // restore modified files to original version, ONLY for Read-Only folders
      "selective_sync" : false, // add folder in selective sync mode
      "known_hosts" : // specify hosts to attempt connection without additional search
      [
        "192.168.1.2:44444"
      ]
    }
  ]
*/

/* Advanced preferences can be added to config file. Info is available at "https://help.getsync.com/hc/en-us/articles/207371636"
For example see folder_rescan_interval below */
//, "folder_rescan_interval" : 600

}
注意根据自己的需要,设定用户名和密码。
然后启动 btsync:
btsync --config .config/rslsync/rslsync.conf --nodaemon
这个命令会以前台方式执行。通常用上面的方式放入到 Tmux 在后台执行。
一键安装其他组件
一键安装 Sonarr, Raddarr, Prowllar, SABnzbd and Jellyfin:
curl https://gist.githubusercontent.com/gsj1377/a7eb727e079a1cefc9baff4e130d8900/raw/app-installation.sh | bash && source ~/.bashrc
Pulsed Media 流量限制
在登录账号之后,在后台右上角可以看到最近 30 天的流量使用情况。在 Pulsed Media 这里,流量的充值日期并不是每个月初,而是滚动限制,也就是当前看到的是过去 30 天的流量使用情况,Pulsed Media 在一篇很久之前的文章中解释了这么做的理由。
总结
总之这么一顿折腾以及完全可以使用,并且可以自动下载一些 Free 的种子,剩余的空间我也可以用来同步自己的文件。
如果你也想购买可以点击我的邀请链接,目前官方的 12 周年几年活动还在继续,页面还有几台特价的机器。并且如果只是小需求,500GB 的套餐 V1000, 1TB 的套餐 M10G,等等首月还可以免费使用,不满意直接申请下个月不续费即可。

如果需求比较大也可以购买 V10G
